




Camera-based system for counting dark spots on white powder (Spot Counter), for a measuring instruments business in Thailand
Spot Counter is a program that counts dark spots on white powder in a tray from camera images, developed for a measuring instruments customer in Thailand. Users can adjust the darkness and spot-size thresholds themselves, and one button gives the spot count with circles marking each position. We delivered the program with a computer, a colour camera and an 8 mm lens in March 2017.
- Industry
- General manufacturing
- Year
- 2016–2017
- Scope of work
- Development of the Spot Counter program (user interface, image processing and software testing) for a powder tray with an 8x10 centimetre inspection area, showing the spot count as a number and showing over 500 when more than 500 spots are found. Supply of the computer, colour camera and 8 mm lens, system installation and configuration, and post-delivery troubleshooting follow-up, including sending a Cube 5 MP camera with lens accessories for trial.
Summary
- Spot Counter is a program that counts dark spots on white powder in a tray from camera images, with an inspection area of 8x10 centimetres, which we developed for a measuring instruments business customer in Thailand.
- Users adjust the darkness (Intensity) and spot size (Size) criteria themselves on the Config page, and the set values remain even after the machine is switched off.
- With one press of Run, the program shows the spot count with a red circle at each spot found, so users can check which spots it counted.
- We delivered the computer with the program, colour camera and 8 mm lens in March 2017.
- The main lesson of this work is to make the lighting even before setting the criteria, because lighting that does not cover the whole tray causes spot detection errors and unequal repeat counts.
The on-site brief
The customer needed to count dark spots (pigment specks or black spots) on white powder in a tray, with an inspection area of 8x10 centimetres. Users had to be able to adjust how dark a spot must be to count, and to see the result on the program screen.
What we did
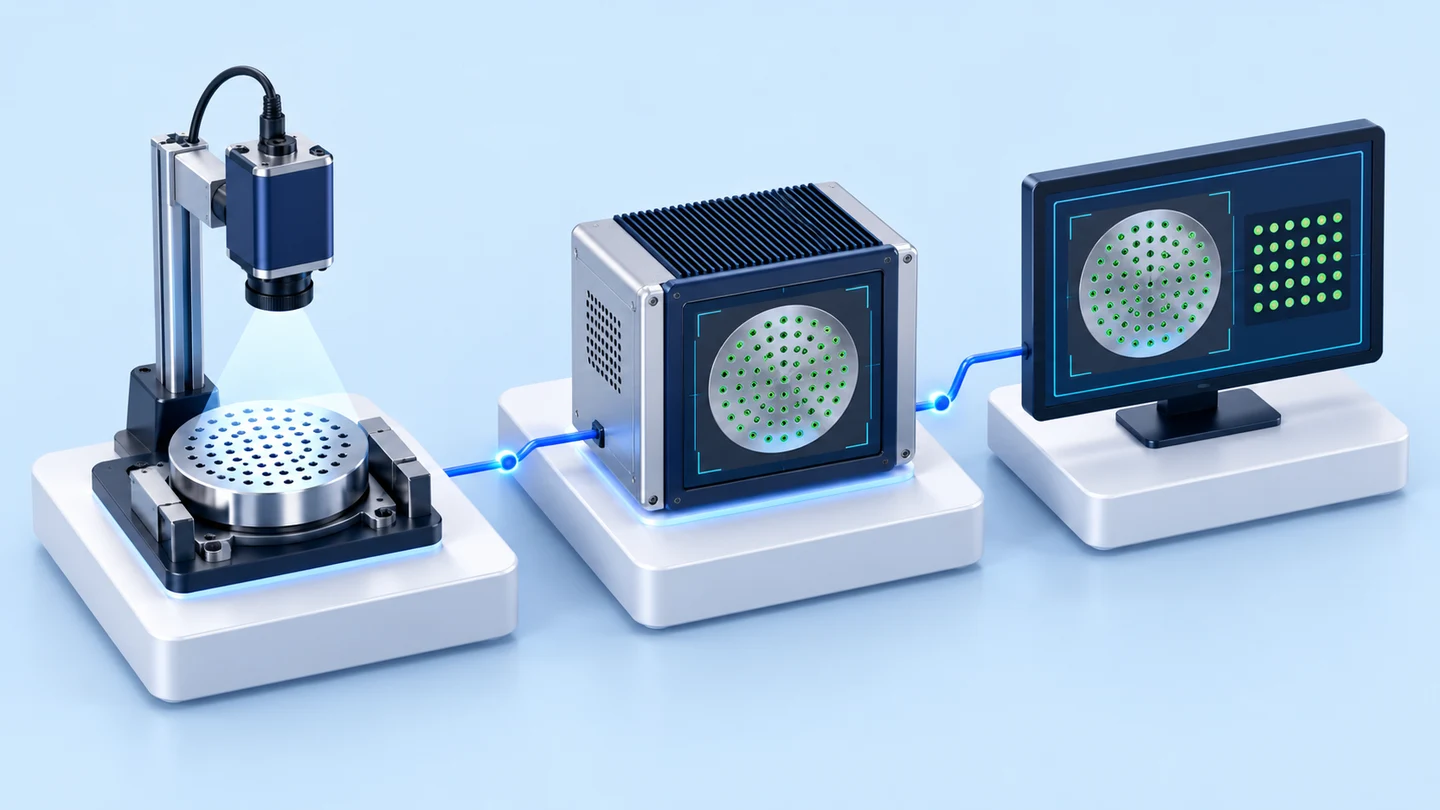
We installed a colour camera with an 8 mm lens above the tray, connected to a computer running the Spot Counter program, which was developed for this work. When Run is pressed, the program separates spots from the powder background according to the darkness (Intensity) and spot size (Size) criteria set by the user, then shows the spot count with red circles at the spots found.
Results
We delivered the computer with the program, colour camera and lens in March 2017, and prepared a functional test list for the program in March–April 2017. After delivery, when repeat counts were not equal, we found that the root cause was lighting that did not cover the whole tray, so we recommended making the lighting even and sent a Cube 5 MP camera for the customer to try in May 2017.
How the brief came about
The challenge in this case was counting dark spots (pigment specks or black spots) on white powder in a tray from camera images, instead of counting by eye. The customer is a measuring instruments business in Thailand, and the area to inspect measures 8x10 centimetres.
In general, counting small spots on a white background by eye takes time, and the result depends on who is counting. A program that counts from images judges every tray by the same set of criteria and shows the result on screen for the user to see straight away.
Requirements and constraints
The system must count spots from an image of the whole tray and let users adjust the criteria themselves without changing the program. The main requirements from the project proposal are as follows:
- Count dark spots on white powder in a tray, inspection area 8x10 centimetres
- Users can adjust for themselves how dark a spot must be to count
- Show the count on the program screen
- Use a colour camera with an 8 mm lens mounted overhead above the tray, connected to the computer delivered with the program
How does the program count spots from camera images, and why was this method chosen?
The Spot Counter program takes a still image of the tray, converts it to black and white according to the darkness (Intensity) and spot size (Size) criteria, then counts the spots that pass both criteria. We chose this method because the brief required that users could set for themselves how dark a spot must be to count. The darkness criterion answers this directly, and the size criterion helps to exclude small marks that are not real spots.
What is a Threshold?
A Threshold (image-dividing criterion) is the value used to divide an image into two parts. In this work, it separates the pixels dark enough to count as a spot from the pixels that are white powder background. Combined with the spot size criterion, this means the program does not count marks that are too small.
- 1
The program is ready once the machine is switched on
When the machine is switched on, the program opens by itself. The left-hand screen shows the live camera image (Preview) so that the user can position the tray within the image frame.
- 2
Press Run to capture a still image
The user presses the Run button or the Enter key on the keyboard, and the program captures a still image of the tray on the left-hand screen.
- 3
Separate spots from the powder background using Threshold
The program converts the image to black and white according to the set Intensity and Size values, then shows the result on the right-hand screen with a red circle at every spot detected.
- 4
Read the spot count
The Result field shows the spot count as a whole number. If more than 500 spots are found, it shows over 500. The user can press the Mark ON/OFF button to show or hide the red circles.
- 5
Adjust the criteria on the Config page
The program asks for confirmation every time before opening the Config page. Users can adjust the Intensity and Size values using sliders, numeric input fields and buttons that decrease or increase the value. The set values remain even after the machine is switched off and on again.
Deliverables
We delivered a ready-to-use spot-counting set, consisting of hardware and a program developed for this work. The delivered items are as follows:
- Spot Counter program: user interface, image processing and software testing
- Computer with the program installed
- Colour camera and 8 mm lens for overhead mounting above the tray
- System installation and configuration
- Post-delivery troubleshooting follow-up
Work steps
This work ran from 2016 to May 2017, from the project proposal through to post-delivery follow-up. The sequence of work was as follows:
- 2016: Submitted the quotation and project proposal, and defined the system requirements.
- March 2017: Delivered the computer with the program, colour camera and lens.
- March–April 2017: Prepared the program's functional test list.
- May 2017: Reviewed images from the customer, advised on lighting and sent a Cube 5 MP camera for trial.
Why were repeat counts unequal after delivery, and what did we recommend?
The root cause was lighting that did not cover the whole tray. After delivery, it was found that repeat counts gave different values and that the program detected black spots incorrectly. We reviewed the images sent by the customer and found that the powder background was not equally bright across the tray, so we recommended arranging the lighting to be evenly bright and sent a Cube 5 MP camera with lens accessories for the customer to try.
Results confirmed from the delivery documents
The confirmed results are the delivery and the functional testing of the program. In March 2017 we delivered the computer with the Spot Counter program, colour camera and lens to the measuring instruments business customer, and we prepared the test list in March–April 2017.
The test list covers the program opening by itself, live and still images, the black-and-white image with red circles, the Result field, the over 500 display, and retention of the Intensity and Size values after the machine is switched off. This case has no measured figures for time or counting accuracy, and the results of the Cube camera trial were not recorded.
What we learned
The key principle of counting spots from images is to make the lighting even before setting the criteria. The principles drawn from this work are as follows:
- Set up the lighting before setting the criteria. If the lighting is uneven, the darker side of the background looks like spots, and adjusting the Threshold cannot fully fix this. In this work, the unequal repeat counts were caused by lighting that did not cover the whole tray.
- The number the system counts must be verifiable against the image. A red circle at every counted spot shows the user what the program counted, and the same image is used to find the root cause when results look abnormal.
- Criteria that users can adjust need a control step. An adjusted value affects the counting of every tray from then on, so this program asks for confirmation before opening the Config page and retains the values after the machine is switched off.
How this approach can apply to your work
If your work requires counting spots, pigment specks or anything that differs in colour from the background on samples in a tray, you can use the same approach as this case: capture images from above, separate spots using darkness and size criteria, then show the count with positions for checking. The parts to adjust are the camera, lens and lighting, to suit your inspection area and spot size.
Reusable parts and parts that need adapting
| System part | Reusable | Needs adapting when |
|---|---|---|
| Camera and lens | Overhead colour camera with 8 mm lens for an 8x10 centimetre area | A larger inspection area or smaller spots to count means selecting a new camera, lens and camera distance. |
| Lighting | Principle of arranging lighting to be evenly bright across the inspection area | If your samples reflect light differently from white powder, the lighting arrangement must be tested again on real samples. |
| Spot separation | Threshold based on user-adjustable Intensity and Size values | If the background is not a uniform light colour, or the spot colour is close to the background, testing on real images is needed before confirming the method. |
| Screen and checking | Run button, spot count, red circles and Mark ON/OFF button | If you need another type of result, such as pass or fail, additional decision criteria must be defined. |
| Inspection method | Inspecting one tray at a time under the camera | If parts run continuously on a conveyor, image capture and triggering must be redesigned. |
- Prepare several types of real samples, with both clear and faint spots, for us to use in testing the lighting and setting the Intensity and Size criteria.
- Define the inspection area size and the smallest spot size to be counted, so that the camera and lens can be selected.
- Agree the range of spot counts the system must be able to handle, and what the program should display when spots exceed that range.
- Decide who has the right to adjust the criteria, because adjusted values affect the counting of every tray from then on.
Read more
- Custom inspection and control system development service
- AI / IoT consulting and system design service
- Case: part counting system with Machine Vision Counter
- Case: ceramic tile inspection system with Machine Vision
- Article: What is Vision Counting, and how are products counted with a camera?
- Article: How AI Vision Inspection differs from human visual inspection
Technology used
Frequently Asked Questions
What kinds of spots can the program count?
In this case, dark spots on white powder in a tray. The program decides based on the darkness (Intensity) and spot size (Size) set by the user. For other samples or backgrounds, we need to test with real images before we can confirm.
Why do repeat counts give different numbers?
In this case, the root cause was lighting that did not cover the whole tray. We reviewed the images sent by the customer, recommended arranging the lighting to be evenly bright, and sent a Cube 5 MP camera with lens accessories for the customer to try.
Can I check which spots the program counted?
Yes. The right-hand screen shows the black-and-white image with a red circle at every counted spot, and users can show or hide the circles with the Mark ON/OFF button.
What equipment is needed?
The set delivered in this case consisted of a computer with the program installed, a colour camera and an 8 mm lens, with the camera mounted overhead above the tray. For new work, we select the camera and lens according to the inspection area size and the spot size to be counted.
How much does it cost and how long does it take?
There is no fixed price; it depends on the requirements, the number of inspection points and the equipment needed. Contact us to request a quotation. We assess the work after seeing your images or real samples.